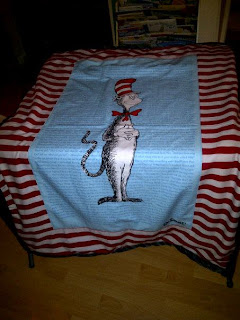
1) First, I took the Cat panel and added 6 strips of striped fabric I had laying around for a border.
2) I sewed a fleece back to it, but left the edges raw (instead of sewing inside out) to reduce bulk later on. This is where I should have stopped, that blanket was cute and easy :).
3) For the weighted part, I changed the original tutorial. The original says just sew with your 2 pieces of fabric, and use acrylic beads. I couldn't find beads, so I used rice, and I wanted it water resistant and removable, so I used two vinyl shower curtain liners.
4) I sewed a double seam around 3 of the sides, leaving the top open, then sewed vertical lines about 2-3 inches apart. Not gonna lie, this part sucked. Sewing vinyl is awful (especially when you accidentally get it caught in the thread cutter!)
5) Then I put a bit of rice into each column, shook it down, and sewed across horizontally. Repeat until you get to the top. You're supposed to do less rice in smaller squares, but at this point, I was frustrated, so I did more rice in huge rectangles. My blanket is noisy now :).
6) The machine left a few tiny holes, I got high tech and stuck some tape on them.
7) I made 8 loops and sewed them around the weighted insert.
8) I made 8 sets of 2 ties (one long one folded in half in each spot) and sewed them to the back of the blanket.
9) I pinned them down so I wouldn't accidentally sew them in the next step since I wouldn't be able to see them.
10) I took a fleece blanket and cut a piece to fit all but a bit at the top of the blanket, then sewed the 3 outside edges.
11) I took a smaller piece of the blanket and sewed the 3 edges on the top, overlapping the bottom layer.
12) After much wrestling with binding, I gave up and bought blanket binding. Even it got all waffled and awful, but at that point, I didn't care. I have since found a great tutorial for binding here. This is the blanket without anything in it.
13) The two layers on the back didn't stay closed well, so I added strips of hidden velcro.
14) To put the weighted part in, I first turned the blanket inside out.
15) Then I put the weighted insert on top of it, threaded the ties through the loops and tied them in knots.
16) Then I turned it right side out and attached the velro.
17) Done. It's made such that I can also put different combos of pillows inside it to make a lounger for him too.
18) How I'm sitting right now. Comfy.


Very well done! Absolutely brilliant information.
ReplyDeleteI used the weighted blanket and its really helpful to relieve the anxiety problem and help to sleep better. I bought my Weighted Blanket from calming moments australia. There are awesome and fast service provider. Very cooperative on phone calls.
I bought one from https://recentstore.com/collections/frontpage/products/weighted-blanket-gravity-anxiety-sleep
ReplyDeleteIt wasn't expansive at all and I love it! I feel more relaxed trough sleep. www.recentstore.com